


In the previous article, we discussed Sign Up Pop-up a use case implementation to capture user information(email address) and create a user profile in marketing cloud personalization through the Revotrix website. An exit-intent pop-up will display to sign-up when an unknown user is about to exit or close the webpage. In this blog, we are working on another use case displaying the Info bar at the top of the webpage.
Use Case
For the best user experience, show real-time information and the latest updates with a CTA button at the top of each web page until a user dismisses or closes the bar.
Solution
Displaying an Info bar at the top of the page, with some message or information and a CTA button that redirects to the other web page.
Make sure the content zone is defined in the sitemap.
Create a Web Campaign using Global Web Template – Info Bar with Call to Action.
Steps to create an Info Bar with a CTA button:
Follow the below steps to create a new Web Template:
- Select a global web template Info Bar with Call to Action and rename it (Infobar with CTA).

- Select a content zone that is defined in the sitemap, the top area to show the info bar at the top of the page.
- Make the required changes in the template editor which can rebuild your template.
- After completing all the steps save the template.
- Always remember to publish it, for further use in web campaigns.
Follow the below steps to create a new Web Campaign:
- Create a new web campaign and rename it.
- Select a created web template (Infobar with CTA) in Experience 1 and configure it.
- Save the campaign.
- Publish it to see the campaign on the webpage.

Configuration steps of Web Template in Web Campaign:
- Select a New Template (Infobar with CTA) in Experience 1, you can see the below window to configure the info bar.
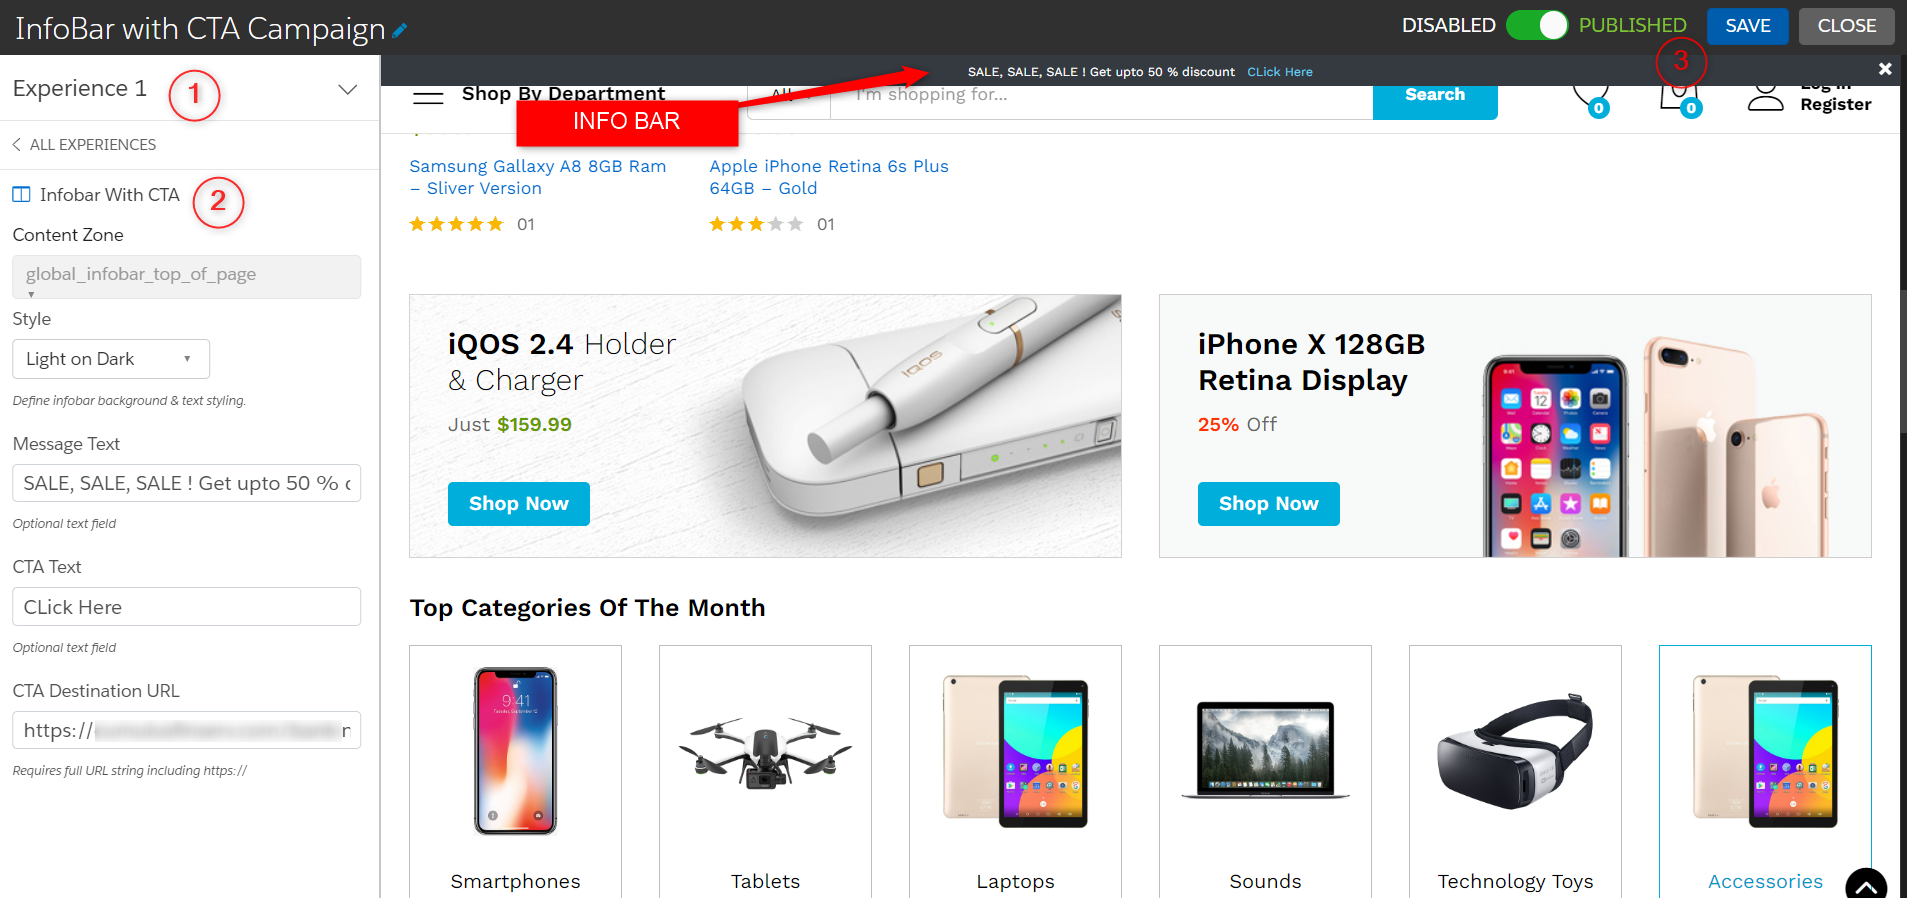
- Configure the style and write a message displayed on the info bar. Provide the CTA name and link which will redirect to the other web page.
- Save the configuration.
Need more details for creating Web campaigns and Web templates follow Salesforce Document Web Campaign & Web Template
Note: Use the Salesforce Interaction SDK Launcher browser extension and enable the visual editor to view real-time changes while building web templates and web campaigns.


