
Overview
Email Deliverability is the core aspects of email marketing .There’s really no point in sending out emails if they don’t reach your prospects’ email inboxes. When it comes to email deliverability, your primary concern is that the emails sent out should be delivered to the right audience at the right time. To ensure this, you will need to regularly check your deliverability factor. If you have a poor deliverability score, it is unlikely that your customers will receive your emails consistently.
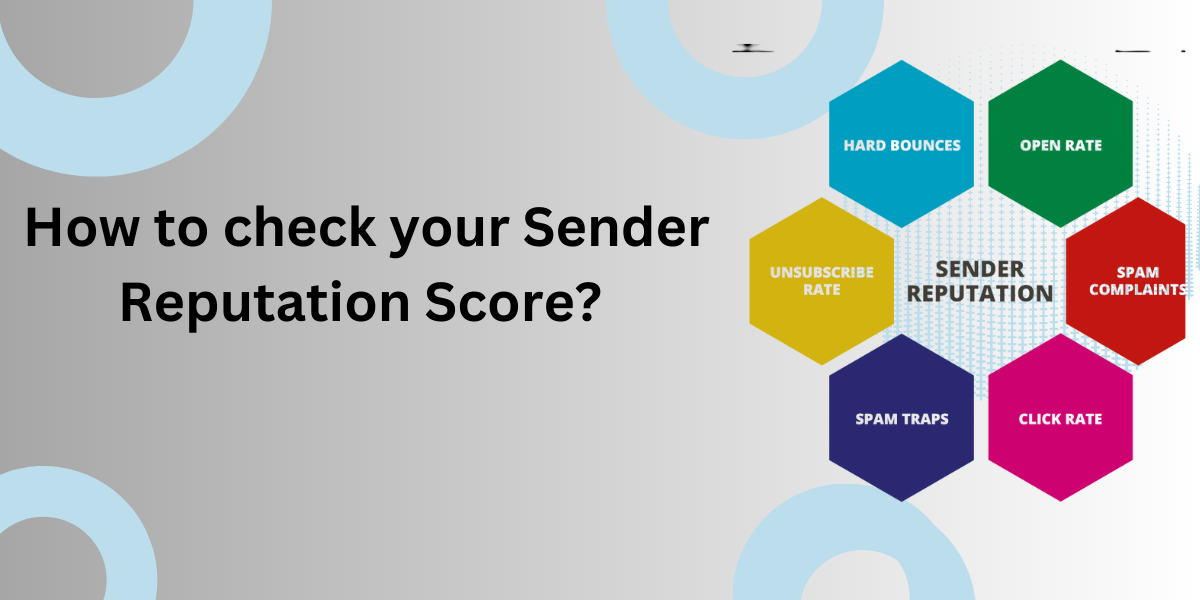
Sender Reputation score is the score of your email sender’s IP address, which means how email service providers view a particular sender’s messaging quality.
Factors contributing to sender reputation
Sender reputation is important in terms of Email Deliverability. Sender reputation is how ISPs percept your email sending behavior. Each ISP assigns you its score, so your reputation can differ depending on an email provider.
Below factors affects your Sender Reputation score:

- Open Rate
- Click Rate
- Hard Bounces
- Spam Complaints
- Spam Traps
To check whether your emails are being blocked or are being sent to spam folders, you will need to check your Email Sender Reputation score. For example, if the sender’s score is 99 it is most likely to get delivered with a good sending reputation to the recipient’s inbox. So, to keep delivering emails where they belong, you should always audit your sender’s reputation and make sure you do not resemble a spammer.
Note: As of 21/08/2023, the reputation audit report has been stopped, and now you can generate the audit report and score using the ‘https://www.mail-tester.com/ ‘ without any support intervention.
Steps to perform Sender Reputation Audit:
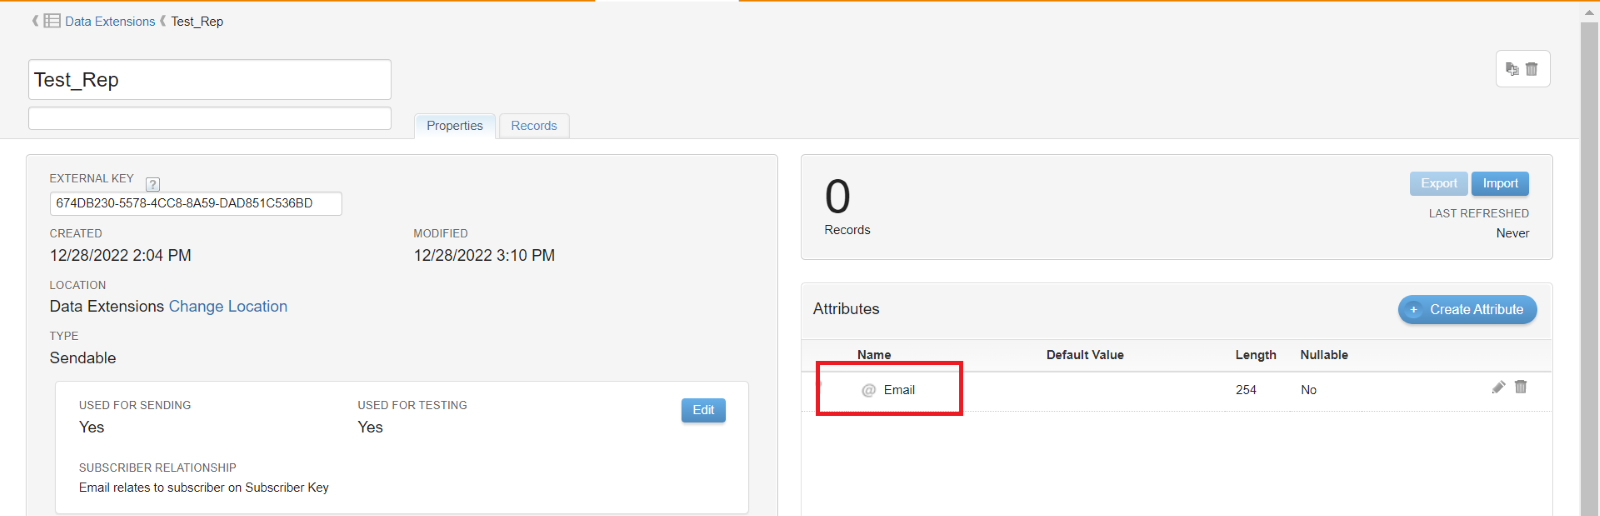
- In the Contact Builder tab, go to Data Extension to create a new Data Extension. You need to create a standard Data Extension with an Email field and EmailAddress as its data Type as shown below.
- Click on the link https://www.mail-tester.com/. A random email address appears.

- Copy that email address and add it to your Data extension created in step 1 in the Email field by using the add record button.
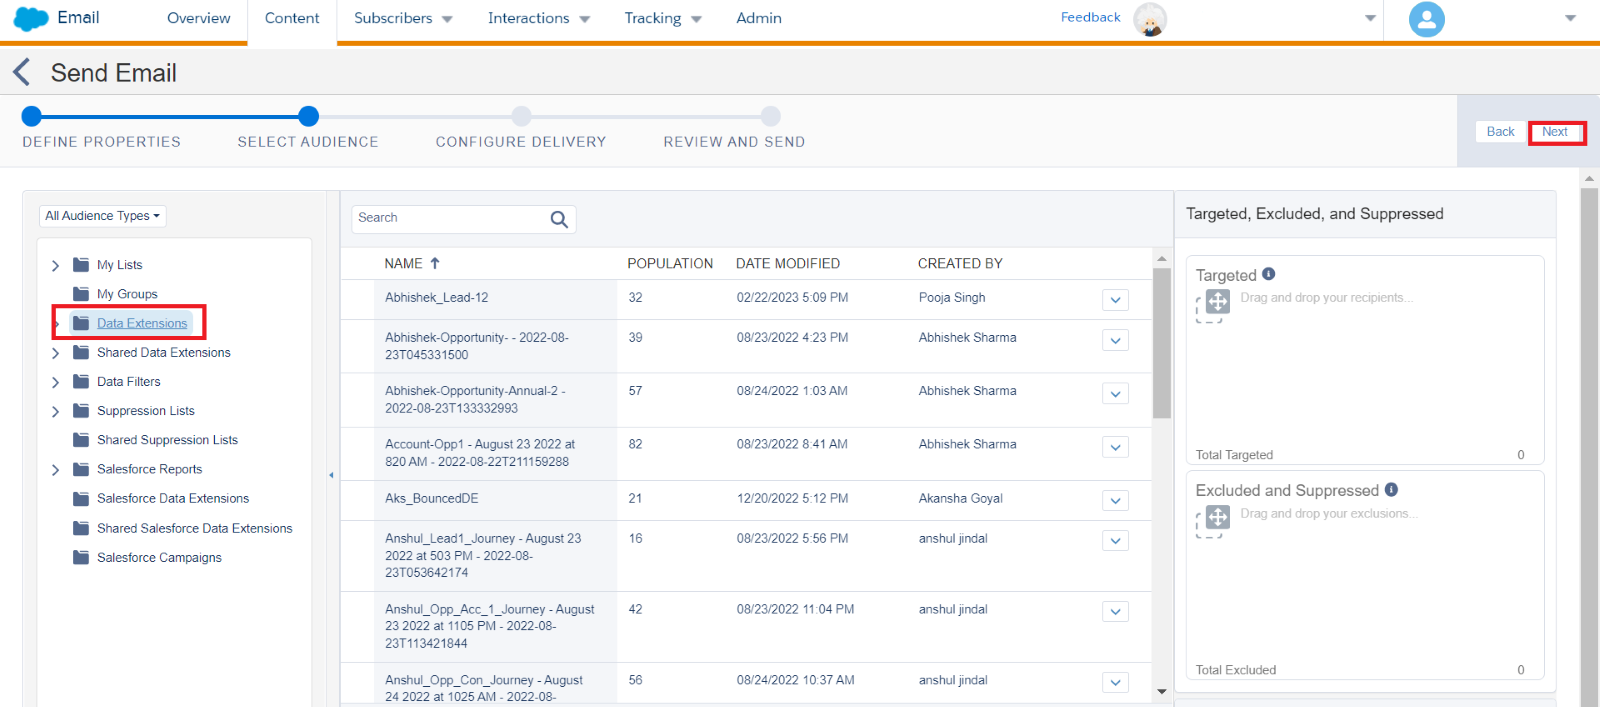
- In Email Studio, go to the Content tab, select any sendable content, and click on Send.
Note: Do not use Test Send to send the Emails, instead directly use the Send option in the Drop-down menu to send the emails.

- Choose the Data Extension you created in step 2 as the Targeted Data Extension, review the send process, and make a send.
- Go to the link https://www.mail-tester.com/ and click on “Then Check Your Score.

Note: The email address should be the same one that you have used in your data extension.
- Your Sender Reputation Score is generated on the same screen.
To know more about Sender Reputation Audit follow this article by Salesforce.


